To finish the work, here I introduce a great App to you - Pavtube HD Video Editor for Mac. The App has the ability to replacing the audio track of Christmas 4K recordings by your own music. In the meantime, it supports for adding subtitles to your 4K videos. In addition to this, the built-in video editor of this App is able to help you trim out your favorite part, or add watermarks into your 4K videos. It’s all up to you!


How to Replace the Audio of Christmas 4K Recordings
Step 1. Load 4K videos
First run the App, drag and drop your Christmas 4K recordings to the App. The picture below is another to import files.

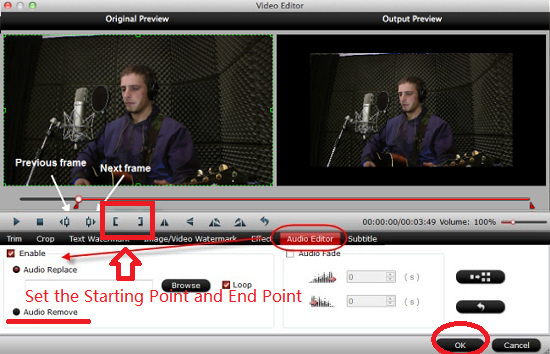
Step 2. Replace the Audio
Then click the “Edit” button on the top menu, a video editor window will popup. Please switch to “Audio Editor” tab and check “Enable” and “Audio Replace” option. Click “Browse” to choose your own music file. When all the work is done, hit on “OK”.
Step 3. Start outputting videos
At last, go back to the main UI and click the big "Convert" button. The App will start to replace the audio of 4K videos with your own music. When the process is finished, you are feel free to share them. Enjoy!
Related Software:
Pavtube iMedia Converter for Mac: If you want to extract the audio out of popular BD movies, you can try our another software - Pavtube iMedia Converter for Mac. This program can help you extract the audio track you like from movies.
Further Reading: